


You’re rolling up to a stop and your brake pedal starts pulsing under your foot, or maybe your steering wheel shakes, or the whole front end vibrates. It’s one of the more unsettling things a car can do, and the instinct is usually to assume the worst. The good news is that brake vibration when stopping is almost always a solvable problem, and understanding what’s actually causing it goes a long way toward fixing it correctly the first time.
The most common explanation you’ll hear is “warped rotors.” The truth is a bit more nuanced, and getting it right matters for how you approach the repair.
Where Is the Vibration Coming From?
Before diving into causes, narrow down where exactly you’re feeling the vibration. The location tells you a lot about the source.
Vibration in the brake pedal only: This is almost always rotor-related. Pulsation traveling through the pedal is a direct signal that the rotor surface or thickness is uneven.
Vibration in the steering wheel during braking: This points to the front rotors or wheels. The steering wheel is connected mechanically to the front suspension and wheels, so any pulsation originating at the front rotors will telegraph through the steering column.
Vibration throughout the whole car: When the whole cabin shakes under braking, the rear rotors can be involved, or you may be dealing with a more significant issue like a stuck caliper or a failed wheel bearing.
Vibration only at highway speeds, not during braking: This one isn’t actually a brake issue. If the vibration occurs at speed but changes when you brake, it’s almost certainly a wheel balance issue or a tire problem. Don’t let a shop sell you rotors for a tire balance problem.
The Real Cause: Disc Thickness Variation
Most brake vibration cases come down to disc thickness variation, commonly abbreviated as DTV. Your rotors need to be the same thickness all the way around. If one section of the rotor is even slightly thicker or thinner than the rest, the pad-to-rotor contact force changes as the rotor spins. That variation gets amplified through the hydraulic system and comes through as a pulse in the pedal.
Here’s the distinction that matters: true physical warping of a rotor, where the disc is literally bent out of flat, is actually rare under normal driving conditions. Cast iron is heavy and doesn’t flex easily at the temperatures most street drivers generate. What’s far more common is DTV, and it develops from two main sources.
Uneven pad material transfer. When you brake, pad material transfers onto the rotor surface in a thin layer. The problem happens when that transfer is uneven. Pads left clamped against hot rotors without rolling, aggressive stops before pads are fully bedded, or pads that are glazed or contaminated can all deposit pad material in thick patches on the rotor rather than in a uniform film. Those thick patches create high spots that the pad rides over unevenly.
Thermal distortion under stress. Rotors do temporarily distort under very high heat. Repeated hard stops from high speed with insufficient cooling can create enough localized heat differential to cause uneven expansion. This is far more common in performance driving or towing situations than typical daily driving.
For a deep dive on DTV and the warped rotor myth, our dedicated post on warped rotor symptoms and causes covers it thoroughly.
Other Causes Worth Ruling Out
Not every brake vibration comes from the rotors themselves. Before throwing parts at it, run through this checklist.
Loose or damaged wheel bearing. A failing wheel bearing causes vibration that can intensify under braking. A bad bearing usually also produces a humming or growling noise that changes pitch with vehicle speed, independent of braking. Grab the tire at 12 and 6 o’clock and try to rock it, then try 9 and 3. Any looseness you can feel is a bearing that needs to be replaced.
Stuck or dragging caliper. A caliper piston or slide pin that’s seized can cause the pad to apply uneven pressure against the rotor, creating localized heat and accelerated, uneven rotor wear. A stuck caliper often presents as vibration combined with a vehicle that pulls to one side under braking, or a wheel that’s noticeably hotter than the others after a drive.
Worn suspension components. Ball joints, tie rod ends, control arm bushings, and strut mounts all contribute to how securely the wheel hub stays in place under load. Brake vibration combined with vague steering or clunks over bumps points you in this direction.
Loose wheel hardware. Lug nuts that aren’t torqued to spec can amplify minor vibrations significantly. Always check that your wheels are properly torqued before assuming a rotor problem.
Step-by-Step Diagnosis
Step 1: Characterize the vibration. Note when it happens, where you feel it, and at what speed. Does it only occur under braking? Only above a certain speed? The more specific you can be, the faster you’ll find the cause.
Step 2: Check your wheel torque. Before anything else, verify your lug nuts are torqued to spec with a torque wrench. This takes 5 minutes and eliminates a common variable.
Step 3: Do the wheel bearing test. With the car safely on jack stands, grab each tire at 12 and 6 and at 9 and 3 and try to detect any play. Spin the wheel by hand and listen for grinding or roughness.
Step 4: Inspect the rotors visually. Look at the rotor surface. Heavy rust, deep grooves, a clearly visible step at the outer edge, or cracks are all visual indicators that the rotor is at end of life.
Step 5: Measure rotor thickness. Use a micrometer to measure the rotor at multiple points around its circumference. If you find variation of more than about 0.001 to 0.002 inches, DTV is your answer. Also compare the measurement to the minimum thickness specification stamped or cast on the rotor hat.
Step 6: Check for caliper movement. With the car on jack stands and the wheel off, look at the caliper. It should slide freely on its pins. If a slide pin is seized, the caliper won’t retract properly.
When Is Brake Vibration Dangerous?
Mild pedal pulsation on a well-maintained vehicle that otherwise stops straight and true is annoying, but not immediately dangerous. What changes the calculus:
- Pulling under braking. If the car pulls to one side when you brake, you have asymmetric braking force. That’s a safety issue, not just a nuisance.
- Significantly increased stopping distance. If you feel like the car isn’t stopping as well as it used to, investigate immediately.
- Pedal sinking toward the floor. Combined with vibration, a pedal that travels further than normal can indicate a hydraulic issue.
- Grinding noise with vibration. If metal-on-metal grinding accompanies the vibration, you’ve got pads worn to the backing plate. Stop driving immediately.
The Fix: New Rotors, New Pads, Proper Bedding
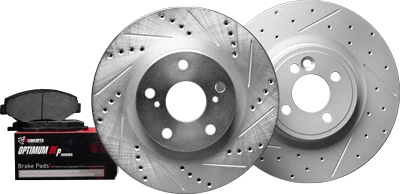
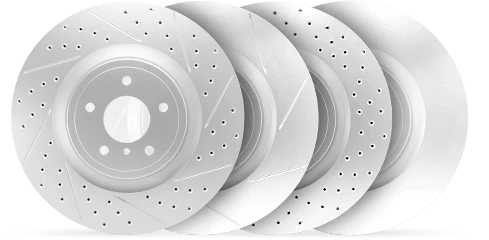
Once you’ve confirmed the issue is rotor-related, the correct repair is new rotors paired with new pads. Resurfacing a rotor on a brake lathe can restore geometry temporarily, but most modern rotors don’t have enough material to survive a resurfacing cut and still remain above minimum thickness. And at the cost of rotors these days, the math rarely favors cutting.
New pads must go in with new rotors. New pads on worn rotors create contact problems because the pad surface conforms to the rotor’s worn profile. On a grooved rotor, the pad transfer is uneven from the start, leading to noise, vibration, and the kind of DTV you’re replacing the rotor to fix.
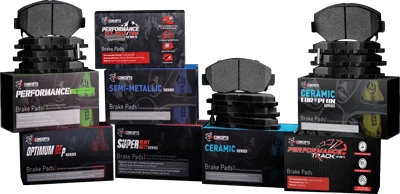
Browse R1 Concepts rotors and brake pads for options matched to your vehicle. If you want to handle the replacement yourself, the brake pad and rotor replacement guide walks through the full process.
After installation, the bedding procedure is mandatory. Improper bedding causes uneven pad material transfer onto the new rotor surface, which recreates the DTV you just fixed. The brake bed-in procedure guide covers exactly how to do this correctly.
Prevention Tips
Bed your pads properly after every new installation. Consistent, even pad material transfer is what keeps rotors running smooth.
Don’t hold the brakes on a hot stop. If you’ve just done a hard stop from highway speed, keep the car rolling slowly for a minute rather than holding the brake pedal down.
Replace pads before they’re completely worn. Worn pads can develop uneven deposits that create DTV over time.
Torque your wheels properly. Use a torque wrench and tighten in a star pattern.
Address caliper issues promptly. A sticky caliper that you ignore today is a set of damaged rotors and pads you’re buying next month.
Frequently Asked Questions
Can I just resurface my rotors instead of replacing them?
Sometimes, but only if the rotor is still above minimum thickness after the cut. If the rotor is close to minimum, a resurfacing cut may bring it below spec.
How long does it take for DTV to cause noticeable vibration?
That depends on driving style, pad compound, and whether the bedding procedure was done correctly. Some drivers develop a noticeable pulse within a few months of installing new rotors improperly.
Will new tires fix brake vibration?
Only if the cause is actually a tire issue. Tire problems typically cause vibration at a specific speed range, not specifically under braking.
Can brake vibration damage other components?
Over time, yes. Prolonged vibration from significant DTV accelerates wear in suspension bushings and bearings. Fix it when you notice it rather than living with it.
