


Your vehicle’s brakes are critical for ensuring your safety on the road. It’s imperative to maintain them in top condition to protect you and your loved ones during travel.
While long stopping power, spongy brakes and increased braking distances are the obvious signs to change your brakes, there are “subtle” signs and cues you should also put into consideration if you’re looking for a sign to when to change your brakes.
This is an exclusive guide written by R1 concepts to help you know when to change brakes.
Key Takeaways
- when you want to change your brake, some indicators you should consider are a thinning brake pad (less than 1/4 inch), squealing or grinding noises from the brakes, and changes in brake pedal feel.
- Factors affecting brake component lifespan include driving habits, vehicle type, part quality, and environment; regular inspections based on mileage and other wear conditions are recommended for timely replacements.
- Proper brake maintenance and replacement involve visual and tactile checks of pads and fluid, selecting quality parts, using correct tools and techniques for replacements, and routine checks to ensure safety and component longevity.
Recognizing the Signs: When Your Vehicle’s Brakes Need Attention
When knowing the signs for brake pad issues, we can use a combination of senses and technical signs to determine them. Here’s a break down of things to determine your brake’s health and if they are needing replacement.
Visual Inspection of Brakes
Conducting a straightforward visual examination can help you determine whether or not you now need to replace your brake pads. Here is a detailed guide on how to visually inspect your brakes:
Spotting Brake Pad Issues
Regular checks of brake pads are essential to maintain effective stopping power and prevent costly rotor damage.
It’s important to do these preliminary steps when you’re going to check your brake pads:
- Lift or secure the vehicle safely using a jack and jack stands to get access to the wheels.
- Remove the wheel to get a clear view of the brake pad and caliper.
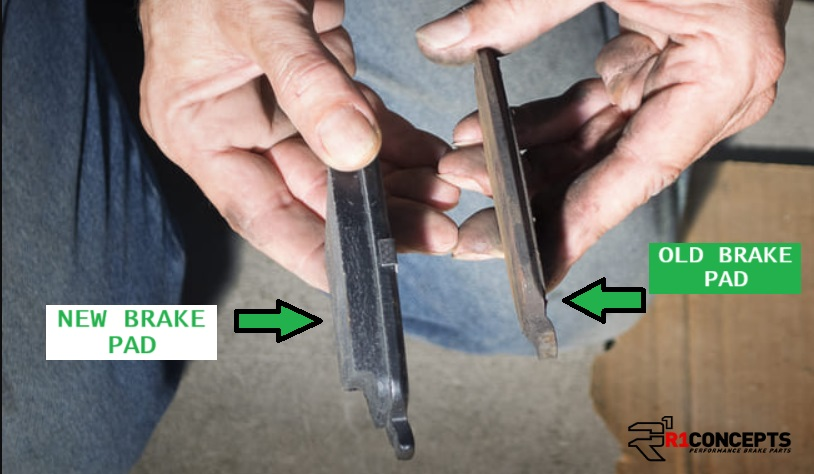
- Inspect For Thin Brake Pads
- Inspect the thickness of the brake pad. Brake pads should be replaced if the pad material is less than 1/4 inch (about 6.4 mm) thick.
- Check for Wear Indicators
- Look for wear indicator slots or marks on the pads. If these are nearly or completely worn away, it’s time to replace the pads.
- Inspect for Uneven Wear
- Check both the inner and outer pads for even wear. Uneven wear could indicate a problem with the caliper or the brake hardware.
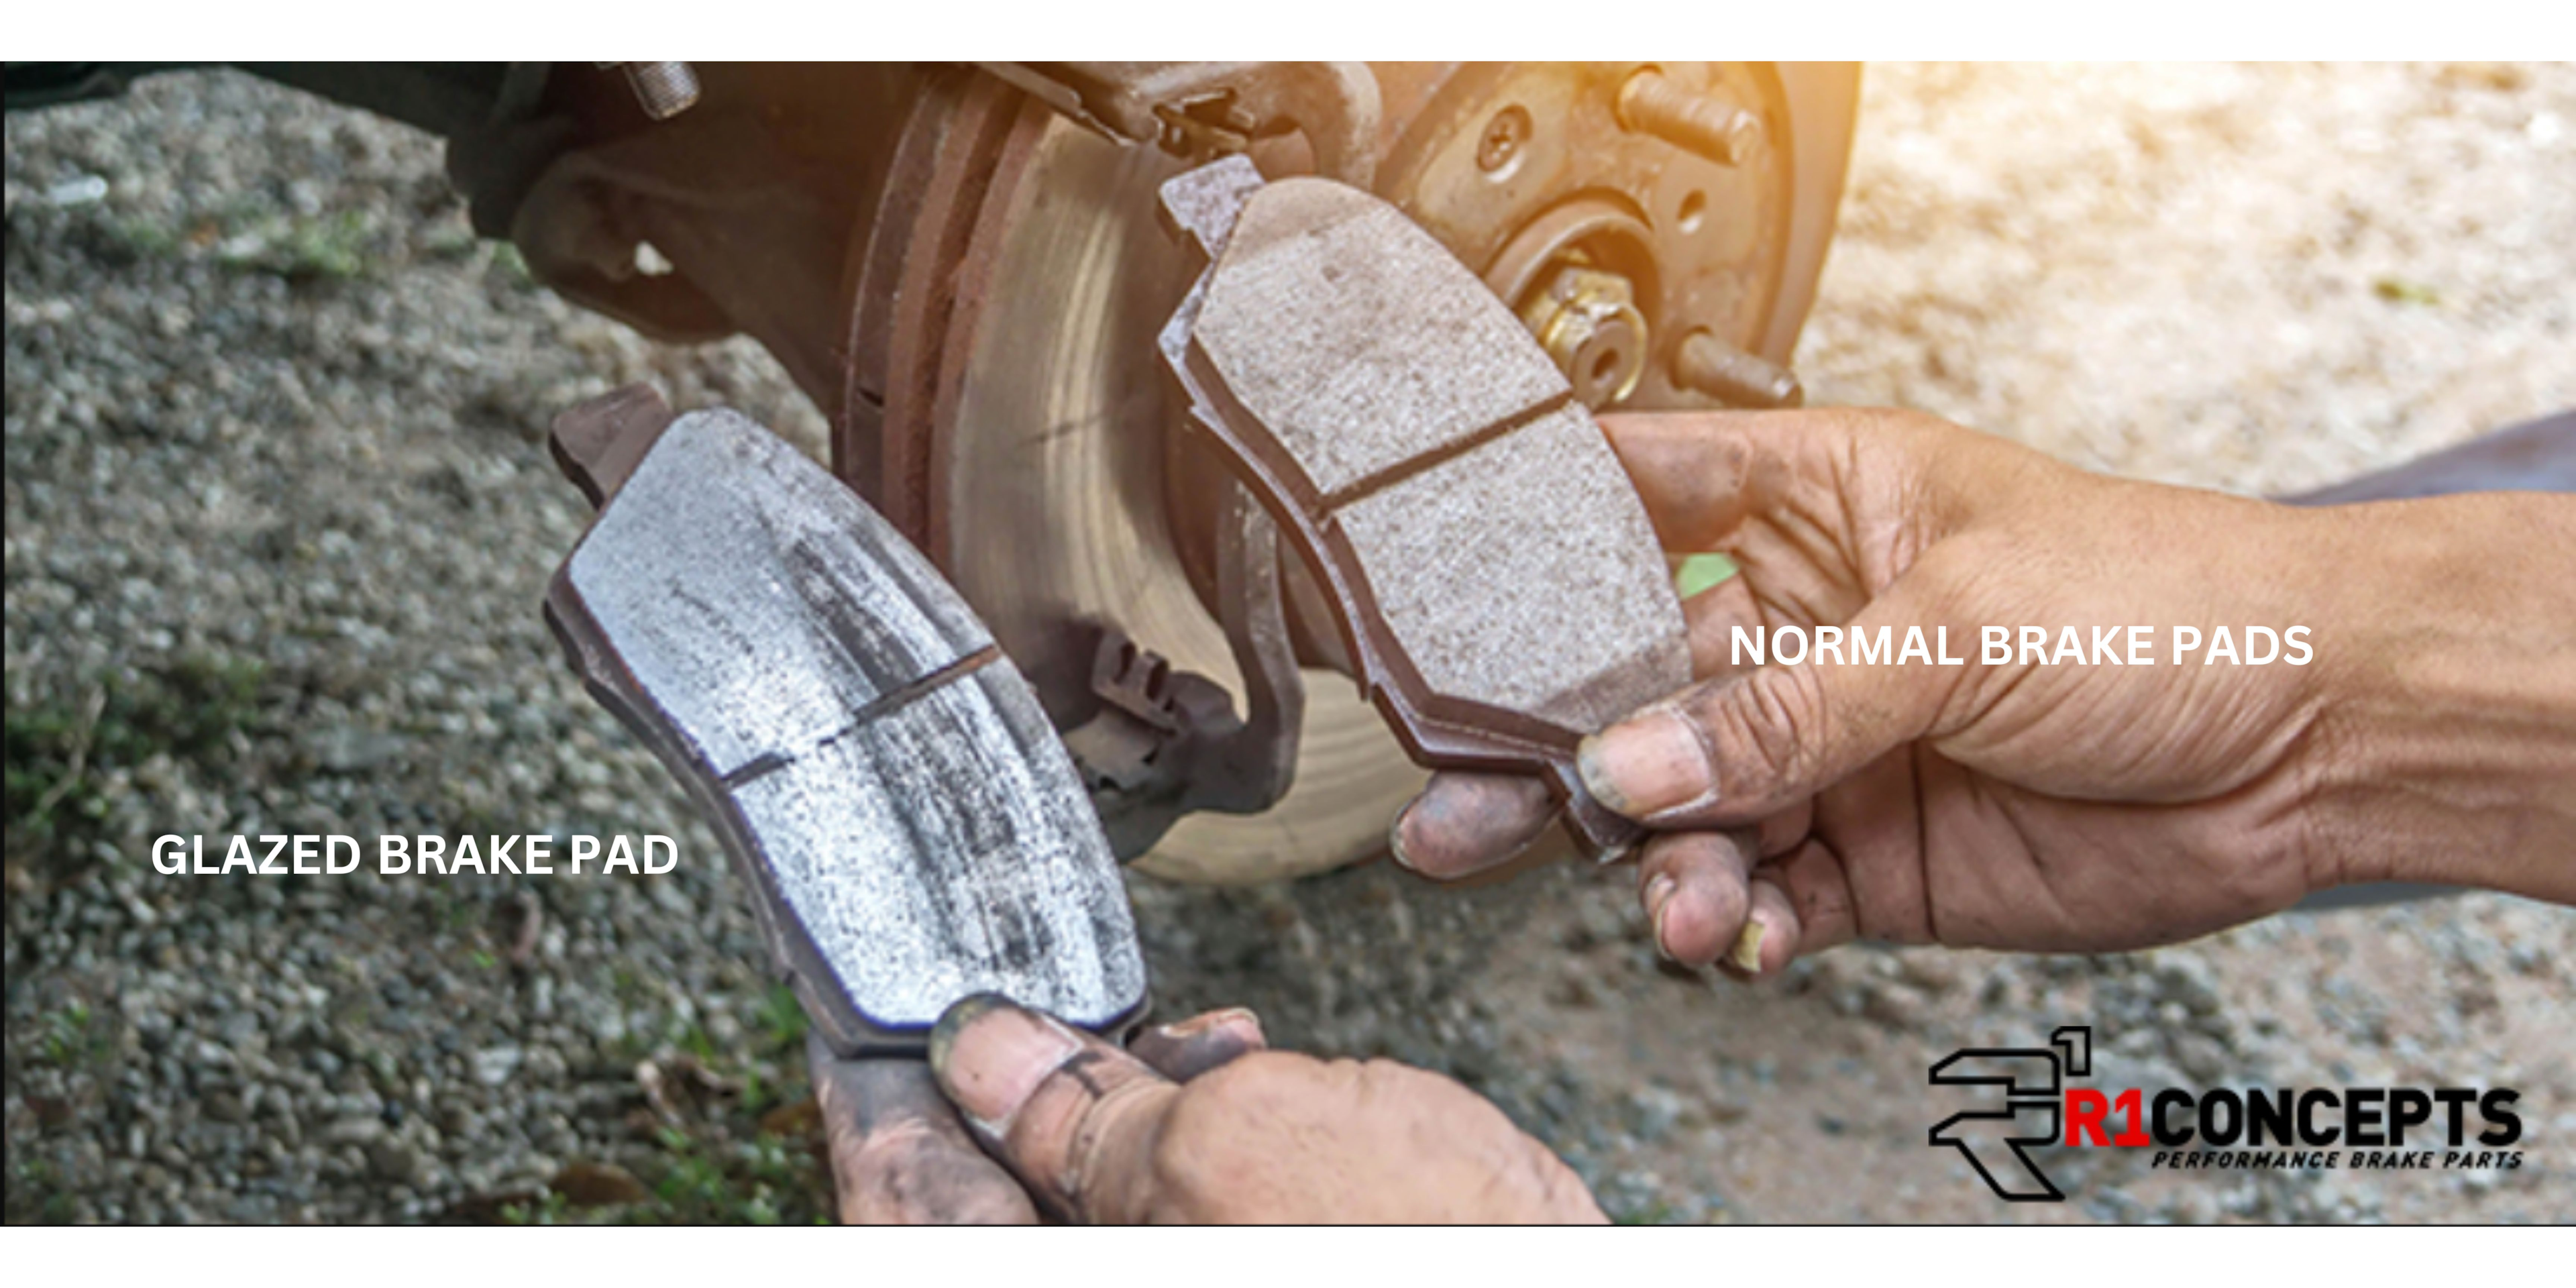
- Look for Glazing
- Examine the surface of the brake pad. Glazed brake pads will appear shiny and smooth, which can reduce braking performance. This condition is often caused by excessive heat and can be remedied by replacing the pads and possibly resurfacing or replacing the brake discs.
- Examine the surface of the brake pad. Glazed brake pads will appear shiny and smooth, which can reduce braking performance. This condition is often caused by excessive heat and can be remedied by replacing the pads and possibly resurfacing or replacing the brake discs.
- Check for Cracks or Damage
- Inspect the pads for any cracks, chunks missing, or other physical damage. Any such damage necessitates immediate replacement of the pads.
- Reassemble: After thoroughly inspecting the brake pads, it’s time to reassemble the wheels. Carefully place the wheel back onto the wheel hub, ensuring that it is aligned correctly. Tighten the lug nuts by hand first to ensure they catch the threads properly, then use a wrench to snug them down in a star pattern to ensure even pressure.
Visual Checking For Bad Rotors
Inspecting your vehicle’s brake rotors is a critical step in maintaining your braking system’s performance and safety. Here’s a detailed step-by-step process to check your vehicle’s brake rotors:

It’s important to do these preliminary steps when you’re going to check your brake rotors:
- Prepare Your Vehicle: Begin by ensuring your vehicle is parked on a level surface, the parking brake is engaged, and the car is turned off. Use wheel chocks to secure the vehicle from rolling.
- Remove the Wheel: Loosen the lug nuts with a lug wrench, lift the vehicle with a jack, and then fully remove the lug nuts and wheel to expose the brake rotor and caliper.
Once your done with securing your vehicle for inspection, it is now time to check your rotors:
- Inspect Rotor Surface: Examine the surface of the rotor for signs of wear. Look for grooves, scoring, or uneven wear patterns. These can indicate that the rotor is worn and may need to be replaced or resurfaced.
- Feel for Surface Irregularities: Run your fingers along the rotor surface to feel for any warping or pitting. Warped rotors can cause vibrations during braking, and pits or heavy rusting can affect braking performance.

- Look for Heat Cracks: Check for the presence of heat cracks or discoloration, which can be caused by excessive heat from hard braking. Cracks can compromise the integrity of the rotor and may necessitate replacement.
- Examine for Corrosion: Inspect the rotor for signs of corrosion, especially around the edges and the venting system if applicable. Excessive rust can weaken the rotor and affect its ability to dissipate heat.
- Check Mounting and Hardware: Ensure that the rotor is securely mounted and that the mounting hardware is not damaged or corroded. Loose or damaged hardware can lead to rotor instability.
- Reassemble and Test: If the rotors are in good condition, reassemble the wheel and lower the vehicle. If you’ve replaced or serviced the rotors, perform a test drive to ensure that the brakes are functioning correctly and that there are no unusual noises or vibrations.
Non-DIY Rotor Inspection
These steps can be done on your own if you’re someone who already has a handful of knowledge when it come to car mechanics. However, if you think that you are not as close as to a car mechanic, we suggest to let a professional mechanic do these inspections:
- Check for Rotor ThicknessUse a micrometer to measure the thickness of the rotor at several points along its surface. Compare these measurements to the manufacturer’s minimum thickness specification. If the rotor is below this minimum, it must be replaced.
- Assess Lateral RunoutLateral runout is the amount of side-to-side wobble in the rotor as it spins. Using a dial indicator, measure the runout to ensure it falls within acceptable limits according to your vehicle’s specifications.
Regular inspections of your brake rotors will help you catch issues early on and maintain your vehicle’s braking efficiency and safety.
Visual Inspection of Brake Calipers
Understanding how to visually inspect your vehicle’s brake calipers is crucial for identifying potential issues that could affect your braking system’s performance. Here’s a step-by-step guide to help you examine your brake calipers:
Preliminary Steps for Caliper Inspection
- Safety First: Ensure your vehicle is parked on a level surface, the parking brake is set, and the car is off. Place wheel chocks around the wheels for added safety.
- Wheel Removal: Loosen the lug nuts slightly before lifting the vehicle with a jack. Secure the vehicle with jack stands and then remove the lug nuts and wheel to expose the brake caliper.
Inspecting the Calipers
- Check for Fluid LeaksInspect the caliper for signs of brake fluid leakage. Look around the piston area and the brake hose connection for any wet or darkened spots, which may indicate a leak.
- Examine the Caliper SlidesEnsure that the caliper can slide freely on its mounts. Restricted movement can lead to uneven brake pad wear and decreased braking efficiency.
- Look for Corrosion and DamageCheck the caliper body and mounting brackets for signs of corrosion, cracks, or other visible damage that could impair its function.
- Inspect the Piston BootThe rubber boot around the caliper piston should be intact and free of tears or deterioration. A damaged boot can allow debris to damage the piston or lead to a seized caliper.
- Check Brake Pad RetentionMake sure the brake pads are properly seated in the caliper bracket and that retaining clips or pins are not damaged or missing.
- Assess the Brake LinesWhile inspecting the calipers, it’s a good opportunity to check the condition of the brake lines for any signs of wear, cracking, or bulging.
Reassembly and Testing
After a thorough inspection, carefully reattach the wheel, ensuring it’s properly aligned. Hand-tighten the lug nuts first, then use a wrench to secure them in a star pattern to apply even pressure. Lower the vehicle and do a final tightening of the lug nuts to the manufacturer’s specifications.
Perform a test drive to ensure there are no unusual noises or vibrations, and that the vehicle stops efficiently and in a straight line.
How Do You Check For Drum Brake Health?
Drum brakes, while less common in modern vehicles than disc brakes, are still present on many cars, particularly on the rear wheels. To ensure your drum brakes are in good working order, it’s important to conduct periodic inspections and look for signs of wear or damage. Here’s a step-by-step guide to inspecting your drum brakes:
- Prepare the Vehicle: Secure your vehicle on a level surface, apply the parking brake, and then lift the car using a jack. Place jack stands for safety and remove the wheels to access the drum brakes.
- Remove the Drum: The drum is typically held in place by screws or the wheel lug nuts. Once these are removed, you may need to gently tap the drum with a hammer to release it from the hub.
- Inspect the Brake Shoes: Look at the brake shoes for uneven wear, cracking, or glazing. The lining should be more than 1mm thick. If it’s less, replace the brake shoes.
- Check for Contamination: Ensure the brake shoes are free from oil or brake fluid, which can impair braking ability.
- Examine the Drum: Check the inside surface of the drum for scoring, grooves, or an uneven surface. Measure the diameter of the drum to ensure it is within the manufacturer’s specifications. If the drum is damaged or worn beyond the limit, it needs to be resurfaced or replaced.
- Look at the Wheel Cylinders: Make sure the wheel cylinders are not leaking any fluid. Inspect the rubber boots for tears or leaks.
- Check the Hardware: Inspect the springs, clips, and other hardware for damage or excessive wear. Replace any components that are not in good condition.
- Reassemble: If everything is in good condition, carefully replace the drum and the wheel. If any parts need replacement, do so before reassembling.
- Adjust the Brakes: After reassembly, ensure that the brakes are properly adjusted. Many drum brakes have an automatic adjuster, but some may require manual adjustment.
- Test Drive: After the inspection and any necessary replacements, perform a test drive to ensure the brakes are functioning correctly and listen for any unusual noises.
Regular inspections and maintenance of your drum brakes are essential for safe driving and can prevent more costly repairs in the future.
Auditory Cues: Listening for Telltale Noises
If your vehicle’s brake pads are severely worn, they often exhibit clear indicators of distress. Brake pads come with wear indicators that emit a high-pitched squeal upon making contact with the rotor. This noise serves as an alert that the brake pads need replacing.
If you hear a clicking sound emanating from the brakes, it could be evidence that the brake pads have loosened in their mounting in the brake calipers or the calipers are the one with loose nut problems. If grinding sounds occur during braking application, it may indicate that the brake pads are excessively worn down—this could stem from issues involving a sticking brake caliper.
Tactile Feedback: Feeling Changes in the Brake Pedal
When assessing the condition of our car’s brakes, sensations from the brake pedal can be quite telling. Vibrations or pulsing sounds when applying pressure to the brake pedal could signal that either rotors are warped or brake pads have worn down and warrant a thorough check-up of the vehicle’s braking system.
If pressing on the brake results in a mushy feeling—where it feels soft and offers less resistance—it’s symptomatic of issues like air present in the brake lines or a deficiency in brake fluid levels; all which will be needing a brake bleed in order to address.
Replace Brakes Based On Use
It’s important to consider the mileage of your vehicle when it comes to considering to change your brakes.
We recommend the to do some replacements on your brakes within certain mileages even if you are not yet feeling any problems within your brakes.
Mileage Checkpoints: When to Inspect Your Brakes
The lifespan of front brakes is greatly influenced by the type of driving, with vehicles used mainly on highways often reaching around 80,000 miles before their brakes need replacement.
Conversely, for those routinely operated in urban environments characterized by regular stop-and-go conditions, a replacement may be necessary after just 40,000 miles.
Driving Styles: When To Check Your Brakes
There are several contributing factors to brake wear beyond just mileage. Heavy and abrupt braking routines can accelerate the deterioration of both brake pads and calipers. The weight of a vehicle has a significant impact on how quickly brake rotors wear out.
If you’re driving on a place that has several uneven terrain, it is one factor that you brake rotors might have a shorter life compared to those who drive within mostly flat terrain. If you use your vehicle often to carry heavy objects and for towing, this can also be a factor that your brake system is vulnerable to early wear and tear than the usual daily driving.
Selecting suitable brake pads for your driving style and choosing the right brake rotors that match your driving habits is essential in extending the life of your brakes. Factors such as weather conditions—selecting rotor types that perform well in wet climates—or accommodating for heavy loads should be considered when choosing these components to ensure they endure through specific wearing circumstances.
Additional Guide to Assessing Brake Health
Your brake health isn’t limited to brake pads and rotors, there are parts that you need to check and assess as well in order to ensure that your brake system is in good shape.
It is just as critical to address any issues with these other components as promptly as you would with the pads and rotors.
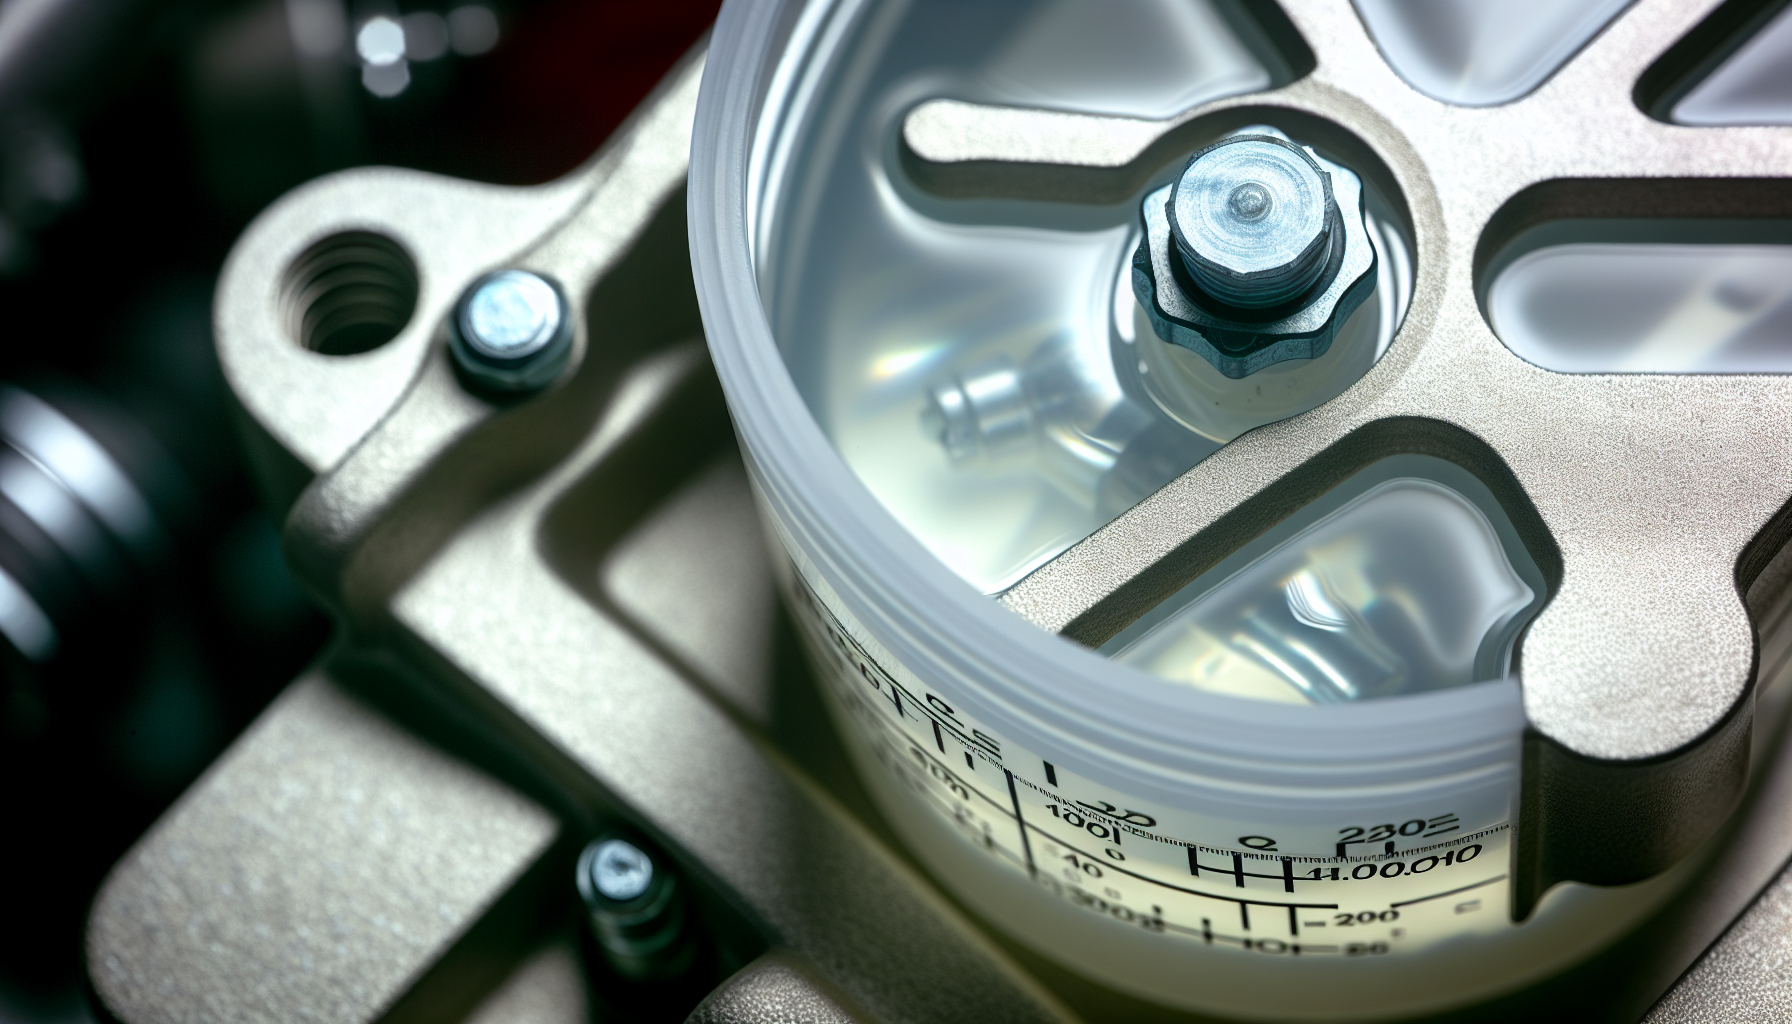
Brake Fluid Check: Ensuring Proper Hydraulic Pressure
Examining the brake fluid is essential for maintaining a healthy brake system. For ideal hydraulic pressure, which is necessary for effective braking, the fluid should have a transparent to light yellow hue. when you see any flakes or debris inside the brake fluid cylinder, it is now time to replace your brake fluid.
If you observe a significant drop below the minimum level mark or find yourself frequently topping off the brake fluid, it’s a red flag signaling a possible leak in the brake system that requires immediate attention. Go check your brake lines to see if there are signs of leaks, then if you did find sources of leaks it is time to go and change them.
How Much Does It Typically Cost To Change Brake Parts?
The total cost can vary widely depending on several factors such as vehicle make and model, the type of brake parts required, labor costs, and the region where the service is performed. Brake parts change can typically range from $80 to $600, depending on the issues and parts needed to be replaced.
For example, brake pad replacements can range from $100 to $300 per axle, depending on the quality of the pads and the labor rates. For rotors, you might expect to pay between $200 to $400 per axle, including parts and labor.
However, if you’re also dealing with calipers, the cost can increase significantly, potentially reaching $1000 or more for a full brake system overhaul. It’s always recommended to get a detailed quote from your service provider before proceeding with any brake work to ensure you understand the full scope of the costs involved.
How Much Does It Typically Cost To Change Brake Parts?
The total cost can vary widely depending on several factors such as vehicle make and model, the type of brake parts required, labor costs, and the region where the service is performed. Brake parts change can typically range from $70 to $1000, depending on the issues and parts needed to be replaced.
For example, brake pad replacements can range from $100 to $300 per axle, depending on the quality of the pads and the labor rates. For rotors, you might expect to pay between $200 to $400 per axle, including parts and labor.
Replacing brake fluid can typically cost between $70 to $120, depending on the vehicle and the type of fluid used. It’s important to use the correct type of brake fluid as specified by the vehicle manufacturer to ensure proper braking performance.
Brake sensors, which are critical for alerting you to potential brake system issues, can also add to the cost. Depending on the type of sensor and vehicle, prices can range from $50 to $100 each, not including labor for installation.
However, if you’re also dealing with calipers, the cost can increase significantly, potentially reaching $1000 or more for a full brake system overhaul. It’s always recommended to get a detailed quote from your service provider before proceeding with any brake work to ensure you understand the full scope of the costs involved.
DIY brake replacement can save money, but it’s crucial to know your limits. Changing brake pads may be manageable for the experienced DIYer, but complex parts like calipers or the brake fluid system should be left to professionals to avoid safety risks. If in doubt, always consult a professional mechanic.
Summary
To wrap up, maintaining the brakes of your vehicle is paramount for ensuring safety and longevity on the road. Understanding the signs of brake wear, knowing the typical lifespan of brake components, and recognizing the right time for replacements are essential for any vehicle owner. Regular brake maintenance not only prevents hazardous situations but also circumvents costly repairs in the future. Reflect on your vehicle’s brake health: when was the last time you performed a brake inspection?
Frequently Asked Questions
Do I need to replace the rotors along with the pads?
While it’s not always necessary to replace both at the same time, it’s important to consider the condition of your rotors when changing your brake pads.
If your rotors are really worn or damaged, there is a high chance that the brake pads also gathered some good damage as well. So it is important to replace them to ensure optimal braking performance and safety.
Does the type of car I drive make a difference in brake life?
Yes, the type of vehicle you operate has a considerable impact on the longevity of your brake system. Different vehicle models have varying brake system designs and requirements, which can influence how often brake components need to be replaced.
For instance, high-performance vehicles such as sports cars, muscle cars, and luxury sedans or vehicles with heavier weights, like SUVs, trucks, and full-sized vans may require more frequent brake maintenance due to the increased pressure and usage placed on the braking system.
Additionally, the materials used in the brake system for different types of cars, like the brake pads and rotors, can vary in durability and performance characteristics, further affecting brake life.
Are Below 3mm on brake pads Still OK To Use?
When it comes to brake pad thickness, anything below 3mm is generally considered too thin and unsafe for use. At this point, the brake pads have reached the end of their service life and need to be replaced to maintain optimal braking performance and safety. Continuing to drive with brake pads this thin can lead to reduced braking effectiveness, increased stopping distances, and a higher risk of brake component damage.
I Have A Brand New Car But My Brakes Are Squeaking, Should I Be Worried About This?
It’s not uncommon for drivers of new vehicles to experience some squeaking from their brakes. While it might be concerning to hear any unusual sounds coming from your car, especially when it’s brand new, there are a few reasons why this might be happening that don’t necessarily indicate a serious problem.
In some cases, the noise could be due to the protective coating on new brake pads or rotors wearing off. It’s also possible that the vehicle has been sitting on the dealer’s lot for a while, which can cause a thin layer of rust to develop on the rotors. This surface rust can cause a squeaking sound until it’s worn off through normal driving.
However, consistent or loud squeaking noises should not be ignored as they could signal a potential issue that might require attention. It’s always a good idea to consult with your dealership or a certified mechanic to ensure that your vehicle is in top condition and to address any concerns about your brakes early on. Regular inspections and maintenance are key to long-term vehicle health and safety.
