


Your engine makes you fast on the straights. Your brakes make you fast everywhere else.
That’s not an exaggeration. Experienced track drivers know that braking zones are where time gets made. A driver who can brake later, harder, and more consistently into every corner is faster than a driver with 50 more horsepower but mushy, fading brakes by lap three.
If you’re heading to your first HPDE event, getting into autocross, or stepping up from street cruising to actual timed sessions, your brake setup needs to match your ambitions. Stock brakes on most vehicles aren’t designed for sustained lapping. They’re designed for the occasional hard stop in traffic, not twenty minutes of repeated threshold braking at triple-digit speeds.
Here’s how to set up your brakes for track use, from the casual HPDE beginner to the serious time attack competitor.
Why Stock Brakes Fail on Track
Before we talk about what to upgrade, it helps to understand why your factory brakes fall apart at the track.
Brake fade. Your factory pads are engineered for a temperature range that covers normal driving conditions. On track, brake temperatures blow past that range within a few laps. When the pad compound exceeds its designed operating temperature, it loses friction coefficient. The pedal feels firm, but the car doesn’t slow down. That’s fade.
Brake fluid boil. Standard DOT 3 and most DOT 4 brake fluids have dry boiling points between 401°F and 446°F. On track, brake fluid temperatures regularly exceed 400°F. When the fluid boils, it creates gas bubbles in the brake lines. Gas compresses (liquid doesn’t), so your pedal goes soft or straight to the floor. Terrifying at 120 mph into a braking zone.
Rotor glazing and warping. Factory rotors are manufactured to adequate tolerances for street use. Under track heat, they can develop hot spots, glazing, and disc thickness variation faster than a higher-quality rotor would. That shows up as vibration and inconsistent braking.
Pad material depletion. Street pads wear faster under track conditions because they’re being pushed beyond their thermal limits. A set of pads that would last 30,000 miles on the street might last two or three track days.
The Three Tiers of Track Brake Setup
Tier 1: HPDE and Beginner Track Days
You’re doing your first few events. Running in the novice or intermediate group. Probably following an instructor. Your pace is building but you’re not pushing 10/10ths yet.
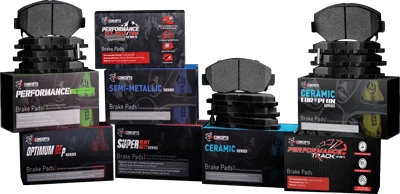
Pads: A street-performance compound that handles higher temperatures than your stock pads but still works well on the street. You don’t need a full race pad at this level. You need a pad that won’t fade in your sessions but also won’t squeal and dust all over your wheels during the drive to the track.
R1 recommendation: R1 PERFORMANCE Series pads. These bridge the gap between street ceramic and full track compound. Good initial bite when cold, strong performance as temperatures climb, and civilized enough for the highway drive home.
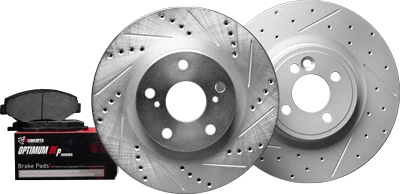
Rotors: Slotted or drilled and slotted. The slots scrape the pad surface with each rotation, exposing fresh friction material and channeling gas and dust away from the contact patch. For HPDE-level heat, drilled and slotted is fine. The thermal cycling isn’t severe enough at this level to stress the drilled holes.
R1 recommendation: R1 eLine Drilled and Slotted rotors with Geomet coating. The coating protects the non-friction surfaces from the corrosion that develops between track days when the rotors are sitting in the garage.
Fluid: This is the cheapest, most impactful track upgrade you can make. Swap your street brake fluid for a high-performance DOT 4 fluid with a dry boiling point of at least 500°F. A bottle costs $20 to $30, a flush takes 30 minutes, and it eliminates the terrifying pedal-to-the-floor moment that sends beginners home early.
Lines: Optional at this level, but stainless steel braided lines are a worthwhile upgrade. Factory rubber lines expand slightly under repeated hard braking, which makes the pedal feel progressively softer through a session. Stainless lines don’t expand. The pedal stays firm and consistent from the first lap to the last.
Tier 2: Intermediate Track Days and Autocross
You’ve done a handful of events. You’re driving at 7 or 8/10ths. Your sessions are getting faster, the braking zones are getting deeper, and you’re starting to notice that your Tier 1 setup gets a little soft by the end of a 20-minute session.
Pads: Time to step up to a dedicated track compound. These pads are formulated for operating temperatures that start where street pads fade. They need heat to work properly, which means they may not have great cold bite. Some drivers at this level run two sets: track pads for events and street pads for daily driving. Swapping pads takes 15 minutes per axle once you’ve done it a few times.
R1 recommendation: R1 PERFORMANCE Track pads. Higher temperature range, aggressive initial bite once they’re up to temperature, and consistent friction through long sessions.
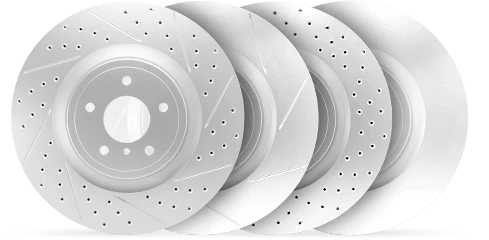
Rotors: Slotted only at this level. Drop the drilled pattern. The additional thermal cycling at this pace can start to stress drilled holes over multiple events. Slotted rotors give you the pad-scraping and gas-venting benefits without the crack risk.
R1 recommendation: R1 eLine Slotted rotors.
Fluid: Same recommendation as Tier 1, but flush it more often. High-performance brake fluid absorbs moisture faster than standard fluid, and moisture lowers the boiling point. Flush before every event or at minimum every other event.
Lines: Stainless steel braided lines are no longer optional. At this pace, pedal consistency matters more than ever. The difference between a mushy pedal and a firm one is the difference between a confident braking zone and a moment that makes you lift early.
Cooling: Start thinking about brake cooling ducts. Even simple ducting from the front bumper opening to the rotor can drop brake temperatures by 100 to 200°F. At this level, heat management becomes as important as pad compound.
Tier 3: Competitive Time Attack and Racing
You’re running timed sessions. Every tenth of a second matters. Your braking zones are fully optimized for your pace, and your brake system is the limiting factor in how late you can brake and how fast you can lap.
Pads: Full race compound. These pads require significant heat to reach their operating window. They’re effectively useless on the street (minimal friction until they’re hot, extremely noisy, heavy dusting). But at operating temperature, they provide friction levels and consistency that no street-oriented pad can match.
At this level, you’re probably running different front and rear compounds to balance the brake bias for your specific vehicle and driving style. The fronts might run a more aggressive compound while the rears run something slightly softer to prevent rear lockup under trail braking.
Rotors: Slotted, with the best metallurgy and dimensional accuracy you can get. At this pace, the rotor is under enormous thermal stress every session. A rotor with inconsistent metallurgy will develop hot spots and DTV faster than one with controlled composition. 100% inspection matters here because even small dimensional variations get amplified under extreme heat.
Fluid: Racing-spec DOT 4 fluid with a dry boiling point of 570°F or higher. Flush before every event. No exceptions.
Lines: Stainless steel braided. Already covered.
Cooling: Purpose-built brake cooling ducts directing air to both the inner and outer faces of the front rotors. Some setups include rear brake cooling as well, especially on vehicles with significant rear brake bias.
The One Upgrade Everyone Should Make First
If you’re going to do one thing before your next track day, replace your brake fluid.
A fluid flush is $25 in parts, 30 minutes in labor (or less if you have a helper), and it’s the single most impactful safety and performance upgrade for track driving. New high-temperature fluid ensures your pedal stays firm through every session, which means you can brake later with confidence instead of backing off because you’re worried about the pedal going soft.
Everything else on this list is about going faster. The fluid flush is about staying safe. Do it first.
Track Day Brake Maintenance Schedule
Track driving is hard on brake components. Here’s when to inspect and replace:
Before every event:
- Visual pad thickness inspection (pull the wheels and look)
- Brake fluid flush (or at minimum, check fluid color and boiling point with a tester)
- Check rotor condition for cracks, scoring, and heat discoloration
- Verify caliper slide pin operation (fixed calipers: check for leaks)
- Check brake lines for rubbing, cracking, or damage
Every 3-5 track days (or annually):
- Measure rotor thickness and compare to minimum spec
- Inspect calipers for piston seal leaks and boot condition
- Rebuild or replace calipers if piston seals are weeping
- Replace brake lines if they show any signs of deterioration
Replace immediately if:
- Pads are at or below 3mm of friction material remaining
- Rotors have visible cracks (even hairline cracks from the edges of drilled holes)
- Brake fluid is dark brown or black
- Pedal feel changes significantly from one session to the next
FAQ
Can I use street pads on a track day?
For your first event in a beginner group, stock or upgraded street pads will probably survive. But you’ll notice fade by the end of a 20-minute session. Dedicated track pads make a massive difference starting from your second or third event.
How many track days will a set of track pads last?
It varies by compound, vehicle weight, track layout, and driving style. As a rough guide, a set of quality track pads lasts 5 to 15 track days. Aggressive compounds on heavy vehicles at demanding tracks will go through pads faster.
Do I need to upgrade my rear brakes for track use?
The front brakes do most of the work (60-80% of braking force), so fronts are the priority. But if you’re running competitive time attack or notice the rear brakes getting hot (smoking, discoloration), upgrading the rear pads and fluid is worthwhile.
What about brake pad bedding between street and track pads?
Yes, every time you swap pads, you should bed them in. The transfer film from your street pads is different from your track pads, so you need to re-establish the correct transfer film each time you swap. This is especially true going from track to street pads, where the aggressive track compound deposits need to be replaced with the street compound’s transfer layer.
Are drilled rotors OK for track?
For HPDE and beginner events, drilled and slotted rotors are fine. Once you’re running intermediate or faster pace, switch to slotted only. The drilled holes become stress risers under the more intense thermal cycling at higher pace.
Shop track-ready brake upgrades for your specific vehicle at r1concepts.com. Use the vehicle search to find pads, rotors, and lines that fit your year, make, and model.
Your brakes determine how fast you can go, because they determine how late you can stop. The right track brake setup lets you push harder into every braking zone with confidence that the pedal will be there when you need it.
