


Did you know brake pads have to be broken in? Most car parts require being broken in before actually living up to their all-star reviews. Brake pads are no different. If you’re wondering how to break in your brake pads, then you’ve come to the right place.
Key Takeaways
- Properly breaking in new brake pads and rotors is essential for optimal braking performance, extended lifespan of brake components, and overall safety.
- The break-in process involves three phases: gentle braking, firm braking, and a cool-down period, each crucial for evenly distributing pad material on the rotor surface.
- Common mistakes to avoid during brake break-in include coming to a complete stop during the process, not allowing enough cooling time, and applying too much pressure too soon, all of which can lead to uneven pad deposits and reduced braking performance.

Follow brake pad procedure:
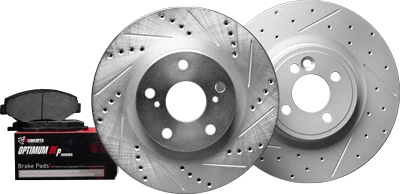
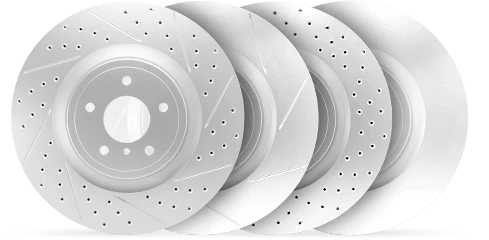
Properly breaking in your new brake rotors and pads is crucial to ensuring maximum, stopping power and longevity. Here are the steps to follow for a successful break-in procedure:
Drive safely and normally for the first 400-500 miles to bed-in the brake pads and rotors.
Gradually allow the brake pads to transfer a layer of friction material to the rotors. This transfer film is crucial because it does most of the work for the brake pads during the braking process.
Why Breaking In New Brakes is Essential

Breaking in new brake pads and rotors is crucial for safety and performance. It helps ensure even pad material distribution on rotors, leading to optimal braking performance and extended lifespan of brake components.
The process involves heating and cooling the brakes repeatedly to deposit a layer of pad material on the rotor surface. This prevents issues like pedal pulsing, vehicle shaking, and steering vibrations. Improper break-in can cause heat spots and cracks, leading to costly repairs and safety risks.
Properly bedding brake pads ensures quieter braking, smoother operation, and avoids uneven pad deposits. Taking time to break in new brake pads and rotors guarantees optimal performance and reliability.
How Long Does It Take To Bed Brakes?
you might be wondering how long does it take to do a brake job, typically, bedding new brakes takes around 15-20 minutes of controlled driving, involving repeated moderate braking to transfer a layer of pad material onto the rotors. The full process is usually completed within 50-100 miles of normal driving.
Step-by-Step Guide to Break In New Brakes
Having established the importance of breaking in new brakes, let’s examine the specifics of the bedding process. This procedure involves a series of controlled heating and cooling through manual brake applications. The goal is to establish an even layer of friction material on the rotors from the brake pads, which helps improve braking performance and prevent brake fade.
The break-in process consists of three main phases: starting with gentle braking, transitioning to firm braking, and ending with a cool-down period. Every phase plays a pivotal role in ensuring the proper bedding of your new pads and rotors. Let’s explore each phase in detail.
Begin with Gentle Braking
The first step in the break-in process is to begin with gentle braking. Here’s how:
- Find a safe, flat road away from traffic to start this phase.
- Drive at a moderate speed of around 35 MPH.
- Apply moderate pedal pressure to reduce your speed to approximately 5 MPH.
This gentle braking process helps to gradually build up heat in the brake pads and rotors without causing any damage.
This gentle braking process needs to be repeated 2-3 times. Accelerate back to 35 MPH and then brake moderately again. This repetition ensures that the brake components start to form an even layer of pad material on the rotor surface, which is critical for optimal braking performance.
Be mindful not to let the brakes cool down completely between these gentle braking applications, as this could lead to an uneven buildup of the film on the rotors. Maintaining a consistent temperature helps in forming a smooth and even layer of pad material, setting a strong foundation for the next phase of the break-in process.
Transition to Firm Braking
After completing the gentle braking phase, the next step is to transition to firm braking. In this phase, you’ll increase your speed to about 50 MPH and then apply firm brake pedal pressure to slow down to below 5 MPH. This firmer braking helps to further bed the brake pads and rotors, ensuring that the pad material adheres evenly to the rotor surface.
To properly bed your brakes, follow these steps:
- Repeat the firm braking process 4-5 times to ensure proper bedding.
- Avoid activating the Anti Lock Braking System during this phase, as it can interfere with the even distribution of the brake pad material.
- Avoid coming to a complete stop to prevent the brake pads from melting against the hot rotors.
Performing firm braking ensures the brake pads and rotors undergo a high friction process, which is vital for optimal braking performance. This phase solidifies the even layer of pad material on the rotors, preparing the brakes for the final cool-down stage.
Cool Down Period
After completing the bedding procedure, a cool-down period is crucial to ensure the brakes perform optimally moving forward. Drive for around 2 miles at a steady pace to allow for gradual cooling of the brake system. This period helps to stabilize the temperature of the brake components, preventing any sudden changes that could lead to damage.
During this steady drive, light taps on the brakes occasionally can aid in the cooling process. This light tapping aids in maintaining an even temperature across the brake pads and rotors. Remember to go easy on the brakes while returning home to allow them to cool properly.
A proper cool-down period ensures that the brake pads and rotors are ready for regular use. This final step in the break-in process solidifies the even layer of pad material, ensuring that your brakes will deliver optimal performance and longevity.
In case that you encounter a noticeable smell during your bedding process, do not worry as this is normal and comes from the materials in the brake pads heating up. The smell usually goes away after a few uses as the brakes settle.
Avoid Common Mistakes During the Break-In Process
For successful completion of the break-in process, it’s vital to steer clear of some common mistakes. One critical error is coming to a complete stop during the break-in process, which can lead to uneven pad deposits on the rotors. This can cause the brake pads to melt against the hot rotors, damaging both components.
Another common mistake is not allowing the brakes to cool down completely before driving again. It’s also crucial to avoid engaging the parking brake during this cooling period, as it can cause uneven cooling and potential damage to the brake system.
Applying too much pressure too soon can cause rapid heat buildup and uneven transfer film deposits. Incorrect pressure on the brakes can also damage the calipers and burn excess grease, leading to smoking brakes. While some smoke from new brakes is usually not a concern, persistent smoking may indicate improper bedding.
Gradually increasing the braking pressure is important to ensure an even distribution of the pad material. Additionally, avoid heavy braking for the first 400 to 500 miles to ensure proper bedding of the brake pads. Running brake pads too hard, too fast can cause pad surfaces to heavily transfer onto the brake rotors when parked, leading to uneven wear and reduced braking performance.
Benefits of Properly Bedding Brake Pads
Adequately bedding brake pads guarantees an even distribution of friction material on the rotors, a key factor in enhancing braking efficiency. A smooth layer of pad material on the rotor surface results in:
- Smoother operation
- Improved braking power
- Prevention of performance issues
- Ensuring that the braking system operates at its full potential.
Skipping the break-in process can lead to:
- uneven deposits of pad material
- pedal pulsing
- vehicle shaking
- steering vibrations
These issues not only affect the comfort of your ride but can also compromise your safety. Proper bedding helps to avoid these problems by ensuring that the brake pads and rotors work harmoniously.
Besides enhancing braking performance, adequately bedded brake pads also lead to quieter braking. The even distribution of pad material reduces the chances of noise and vibrations during braking, making for a smoother and more pleasant driving experience. By taking the time to properly bed your brake pads, you ensure that your braking system delivers optimal performance and longevity.
How to Identify If Your Brakes Are Properly Broken In
There are multiple signs that your brakes have been correctly broken in. One of the key signs is consistent brake performance. If your brakes respond smoothly and predictably, it’s a good indication that the break-in process was successful.
Another sign is smooth braking without any pedal pulsing. Pedal pulsing usually indicates uneven pad deposits on the rotors, which can be avoided by properly bedding the brake pads. Additionally, the absence of noise during braking suggests that the brakes are properly bedded.
A properly broken-in brake system will also exhibit no vibrations in the steering wheel. Vibrations can be a sign of uneven pad material deposits, often misdiagnosed as a warped rotor. By ensuring that your brakes are properly bedded, you can avoid these issues and enjoy a smoother, quieter braking experience.
Summary
In summary, breaking in new brakes is an essential process that ensures optimal braking performance and longevity of your brake components. The break-in procedure involves a series of controlled heating and cooling, starting with gentle braking, transitioning to firm braking, and ending with a cool-down period.
By following this step-by-step guide, you can ensure that your new brake pads and rotors are properly bedded, resulting in smoother operation, improved braking power, and quieter braking. Avoiding common mistakes during the break-in process is also crucial for achieving the best results.
Remember, taking the time to properly bed your brakes is an investment in your safety and the longevity of your braking system. Follow these steps, and you’ll be rewarded with a reliable and efficient braking performance.
Frequently Asked Questions
Why is it important to break in new brake pads and rotors?
Breaking in new brake pads and rotors is important to ensure optimal braking performance and extend the lifespan of brake components by allowing for an even distribution of friction material on the rotors. This helps prevent issues such as pedal pulsing and steering vibrations.
How long for brake pads to break in?
For the first 300 km, frequent and gentle braking helps increase the contact surface area between the new pads and discs, enhancing long-term braking performance. Advise your customers to brake lightly but often during this initial period.
What common mistakes should I avoid during the break-in process?
During the break-in process, avoid coming to a complete stop, not allowing brakes to cool down, applying too much pressure too soon, and heavy braking within the first 400-500 miles for optimal performance and longevity of your vehicle.
How can I tell if my brakes are properly broken in?
You can tell if your brakes are properly broken in by checking for consistent braking performance, smooth braking without pedal pulsing, absence of noise during braking, and no vibrations in the steering wheel. Always monitor these signs to ensure your brakes are in top condition.
What are the benefits of properly bedding brake pads?
Properly bedding brake pads ensures even distribution of friction material on the rotors, leading to enhanced braking efficiency, smoother operation, improved braking power, and quieter braking.
is it easy to replace brake pads and rotors?
Replacing brake pads and rotors can be simple for someone experienced, as they know the steps and tools needed, making it a 1-2 hour job. For a beginner, it may take longer and be more challenging, especially when handling stuck parts or complex brake systems. With the right guidance, beginners can learn, but extra patience and careful attention are needed.
Extend the Life of Your Brakes
Ready to upgrade?
