
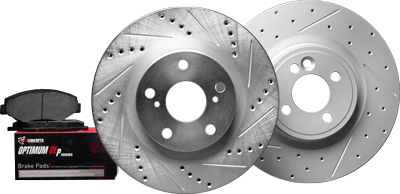


For all the people who are changing your brakes pads for the first time on a SRT8 and need some kind of good tutorial because you don’t want to mess up those precious Brembo Calipers, here you go:
TOOLS NEEDED:
- Impact Wrench/Breaker Bar
- 21mm socket
- Torque Wrench
- Small Punch
- Hammer
- Large Pliers
- 3M Super 77 Multipurpose Adhesive (not required)
Using the Breaker bar or Air Impact wrench and the 21mm socket (or different for the aftermarket wheel/lug guys), remove the wheels and set aside.
- This step is optional, some people may disagree. But in my years of service work i found that a lot of squealing comes from vibration/movement between the pad and piston. So if you adhere the pads to the pistons, problem solved. Before you start the brake job lay out the pads on the box they came in or on some cardboard and spray them with 3M Super 77 Multipurpose adhesive. Do this before the brake job so they can get tacky by the time you need them.
- Once you have the wheels off this is what you will start out with:
- Take the punch and hammer and punch out the slide pins
- Now, some people have bought or rented a pad spreader from stores and vendors. I think it’s a waste of money. Use the large pliers and open them up like below. Take both hands and open the pliers which in turn will spread the pads a good bit. More than enough to get the old pads out.
- I didn’t get a picture, but; Remove the pads now. They will just slide out, you may have to give them a little shake or jiggle.
- Once they are out, take the pliers you used earlier and open them up and insert into one side of the caliper between the pistons and the rotor making sure each end of the pliers is against each piston. Pry against the rotor slowly to compress the pistons; then do the other side. See below
- Take the slide pins and clean them up with a rag and take some of the grease supplied with most pads and put a light coat on them slide pins. This helps the pads slide back and forth easier.
- Insert new pads
- Once the pads are in, put the slide pins in and tap into place. I find it easy to turn the punch around and use light taps with the hammer to tap them into place.
Viola… that corner is done and it should resemble this! Granted the pins aren’t all the way in, but you get the idea.
Since you’re already under there go ahead and clean up that caliber, strut, inner fender, disk, ect… It looks so much better clean.
The rear is the same thing.
Use punch and hammer to punch out and remove slide pins
- Refer to the step 4 above on how to spread the pads using the large pliers.
- Remove the pads
- Refer to step 6 above to push in the pistons using the large pliers
- Refer to step 7 on cleaning and greasing slide pins
- Refer to step 8 on installing the new pads
- Insert slide pins and tap into place with hammer and punch
Now you are done with the Rear.
Repeat these steps for the other side and you’re done!
This should do it for changing the pads on an SRT8!
-tutorial by EXTREME from lxforums __________________