


Come check out R1 Concepts’ booth at the Extreme Auto Fest show located in San Diego at the Qualcomm Stadium on June 1, 2008. Baby Bash along with other DJs and performers will be live on stage. There will be bikini contests and models at the event as well. This EAF San Diego will feature […]
Archive | May, 2008
2009 Nissan Maxima bringing back the 4DSC?
Nissan has redesign the soon to come, this summer, the all new 2009 Nissan Maxima. Nissan has shorten the wheel base but the new Maxima looks bigger then the previous Maxima. How can that be? Nissan calls this “Liquid Motion,” Nissan states that they butched up styling which gives it a aggressive stance. The headlights […]
Comments are closed
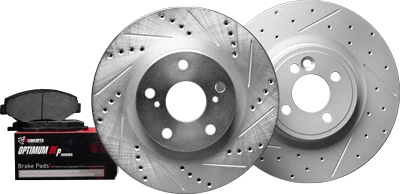
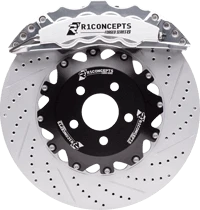
Civic/Integra Big Brake Caliper & Rotor Upgrades for LESS?
The content below was provided by BrakeExpert and is posted with his expressed permission. Did you always wanted a Big Brake Kit for your Honda Civic or Acura Integra, but couldn’t afford it? Now we got some information on how you can save yourself some extra change by upgrading your 10 inch brake rotors to […]
Comments are closed
How to Install Brakes for Toyota Solara
The tutorial below was provided by Tacti and is posted with his expressed permission. Sponsors, you may contact Tacti to do a installation or product review of your products. Tacti purchased 2004 Toyota Solara brake rotors, but the installation procedure should be the same for 2004-2007 models. Readers, if you would like to do a […]
Comments are closed
Search
Latest Post
- Tacoma Getting a Much Needed Brake Refresh!
- Do You Need to Replace Rotors When Replacing Brake Pads?
- Brake Vibration When Stopping: Causes and Fixes
- How to Reduce Brake Dust on Your Wheels
- FIESTA PRERUNNERS in San Diego!
- How Long Do Brake Pads Last? Signs They Need Replacing
- What Is Brake Fade and How to Prevent It
- How to Bleed Brakes: Step-by-Step DIY Guide
- Crawling CLIFFHANGER in the RAIN with SHERPA
- Soft or Spongy Brake Pedal: Causes and Fixes
Categories
- Accessories
- ALL POSTS
- Announcement
- Articles
- Big Brake Kits
- Brake Calipers
- Brake Kits
- Brake Pads
- Brake Rotors
- Car Care Tips
- Car News & Reviews
- Car Shows
- eBay
- Entertainment
- Events
- Great Braking Matters
- How To's
- New Releases
- Other Brake Parts
- Promotion
- R1 Concepts Braking News
- R1 Concepts Ride of the Week
- R1 Model Interviews
- Raffles
- Rants
- tutorials
- Videos
Customer Care
Call our toll-free number:
1-888-712-6623
1-888-712-6623
